Enjoy discounts on fresh flower deliveries!
Create a Stunning DIY Paper Bloom Bouquet: The Ultimate Guide to Making Tissue Paper Flowers
Dreaming of a beautiful bouquet that lasts forever? Learn to create elegant tissue paper flowers—an easy and affordable way to craft a stunning floral arrangement with your own hands. Get ready to feel like a crafting wizard as you make gorgeous, long-lasting blooms for any occasion.
9/10/20256 min read

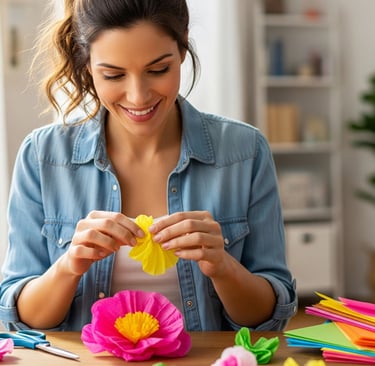
Ever look at a beautiful bouquet and think, "I wish I could make something like that, but for keeps?" Honestly, it’s a pretty common thought. There's just something so rewarding about crafting something beautiful with your own hands, especially when it's as elegant and surprisingly simple as a tissue paper flower. Whether you’re dreaming up budget-friendly wedding decorations, needing a splash of color for a baby shower, or just looking for a creative outlet on a quiet afternoon, these paper blooms are your new best friend. They’re super easy to make, require minimal supplies, and the result? A truly gorgeous and long-lasting paper flower bouquet that'll make you feel like a crafting wizard.
So, let's get into it, shall we? You know what they say: the best projects are the ones you can tackle with a cup of coffee and your favorite tunes playing in the background.
Getting Your Garden Supplies in Order: What You'll Need
Alright, before we get our hands sticky (don't worry, they won't be, but you get the idea), let's talk about the gear. The great thing about this craft is you probably have most of this stuff lying around your house already. We're keeping it simple and straightforward.
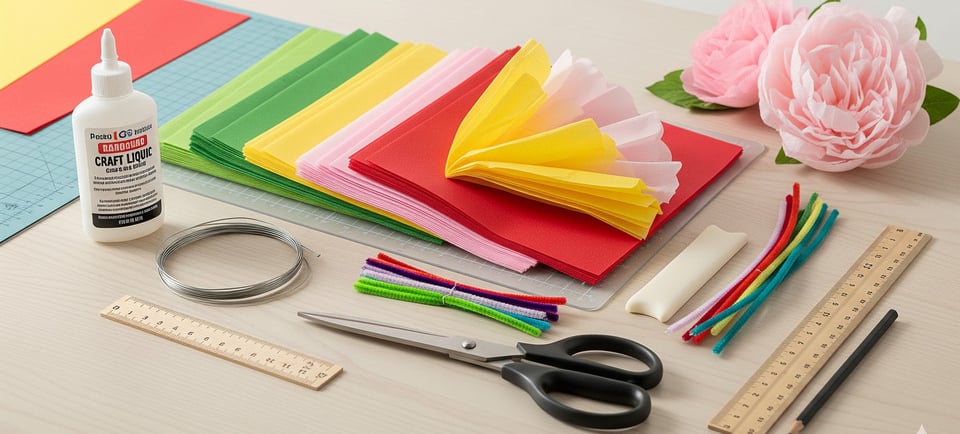
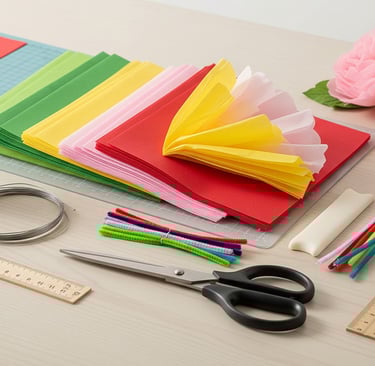
Essential Tools & Materials:
Tissue Paper: This is, obviously, the star of the show. You can grab a variety pack with a bunch of different colors, or just a few packs of your favorites. Think about the mood you're going for—bright and poppy, or soft and pastel? The choice is yours. A little pro-tip: thicker, high-quality tissue paper is a bit more forgiving, but any kind will work.
Scissors: Just a standard pair of sharp scissors. Nothing fancy needed.
Floral Wire, Pipe Cleaners, or Twine: This is what holds your paper flower together at its core. Floral wire gives you a nice, sturdy stem, while pipe cleaners are perfect for little ones (and they come in fun colors!). If you're going for a more rustic look, a piece of string or twine works just as well.
A Ruler or Measuring Tape (Optional but Helpful): This helps you keep your folds consistent, which makes for a neater-looking final product. But hey, if you're a "fly by the seat of your pants" kind of person, don't sweat it. The charm of a handmade flower is in its slight imperfections.
That's it! Pretty simple, right? It’s amazing what you can create with so few supplies.


The Art of the Accordion Fold: Your First Step to a Beautiful Paper Bloom
Ready to get to the good part? This is where the magic really starts to happen. We're going to transform a flat stack of paper into a three-dimensional work of art.
Stacking Up Your Sheets: First things first, grab about eight to ten sheets of tissue paper. The number of sheets depends on how full and fluffy you want your flower to be. More sheets equals a fuller, more robust bloom. For a really fluffy pom-pom flower, you might even go for twelve sheets. Stack them neatly on top of each other, making sure the edges are aligned. This is crucial for a clean fold.
The Accordion Fold: Lay your stacked papers flat on a surface. Now, start folding. Take about a 1- to 2-inch section from the short end and fold it over. Then, flip the entire stack and fold it back in the opposite direction, just like you’re making a paper fan or a classic accordion. Keep going, folding back and forth, until you've folded the entire stack into one long, compressed rectangle.
Secure the Center: Gently fold your accordion in half to find the exact middle. This is where you'll secure it. Take your floral wire or pipe cleaner and wrap it tightly around the center crease. Give it a good twist to make sure it's secure. This little step is what holds all your hard work together, so don’t be shy with that twist!


Giving Your Paper Petals Their Personality: Shaping and Fluffing
Here's where you get to put your own creative spin on things. The way you trim the ends of your folded paper will determine what kind of flower you end up with. A rounded end gives you a soft, peony-like look, while a pointed end will create a spiky, dahlia-like vibe. Want to make a carnation? Simply cut a little fringe along the ends. Feel free to experiment! You could even mix and match for a bouquet with a lot of different personality.
Once your ends are trimmed, it's time for the most delicate and satisfying step: fluffing.
Separate with Care: This is the part that requires a gentle touch. Start by slowly and carefully pulling up the top layer of tissue paper from one side, peeling it away from the layer below it.
Fluff and Form: Continue pulling each layer of paper up towards the center, one at a time, until you have fluffed out half of the flower. Then, flip the entire thing over and repeat on the other side. You'll be amazed as the flat, folded paper transforms into a beautiful, fluffy blossom right before your eyes. Don't worry if a layer rips a little bit—it’s usually completely unnoticeable once the flower is fully fluffed out.
And just like that, you have a beautiful, handcrafted paper bloom. It's so cool how a bit of paper can look so much like the real deal, isn't it?


FAQs on DIY Paper Blooms
Q: Can I use different kinds of paper?
A: You sure can! While tissue paper is the most common for that soft, ethereal look, you can also use crepe paper for a more realistic, textured feel. Even old book pages can work for a vintage-style flower bouquet. The same folding and fluffing methods generally apply, so you can totally mix and match materials to get a truly unique look.
Q: How do you make the flowers stand up?
A: That's a great question, and it all comes back to your stem. If you’re using floral wire, it’s stiff enough to hold the flower upright in a vase on its own. If you’re using pipe cleaners or twine, you can add a dab of hot glue to secure the stem at the base of the flower to give it more stability. Or, you know, you can skip the stem altogether and use them to decorate gifts, walls, or a party banner!
Q: My flower looks flat. What did I do wrong?
A: The most common culprit is not using enough layers of tissue paper. To get that full, voluminous look, you really need at least eight sheets. Another possibility is not fluffing each layer individually and carefully. Remember, you want to pull each petal up toward the center, not just outward. Keep at it! It takes a little practice to get the hang of it, but trust me, it’s worth it.
Q: How can I add a personal touch to my flowers?
A: This is the fun part! You can try a variety of things. Use a different colored sheet of tissue paper for the top layer to create a two-toned effect. You could also snip the tips of the petals into a jagged or wavy shape for a whole new style. Another idea is to spritz the finished flower with a light perfume or fragrance spray to give it a lovely scent. The possibilities are endless!
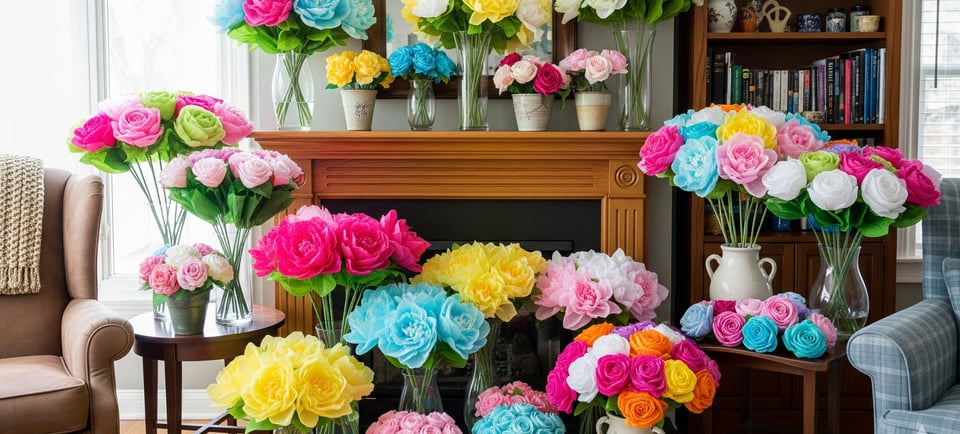
The Joy of a Making Paper Flower Bouquets
These DIY paper flowers are so much more than a simple craft. They're a way to bring color and beauty into your home, to make a personalized gift for someone special, or even to create decor for a milestone event like a wedding or birthday. They’re a reminder that you don't need to be a professional florist to create something breathtaking.
There's a real sense of accomplishment that comes with taking a stack of flat paper and transforming it into a piece of art. It’s a meditative process that lets you get lost in the moment, and the finished product is a physical representation of your creativity and effort.
So, go ahead and give it a try. Grab some tissue paper, get a little messy, and make something beautiful. You'll be amazed at what you can do. And who knows? Maybe you’ll find a new passion.
Delivery
Your trusted partner for flower delivery worldwide.
Service
Quality
For Fast Response
Please contact by email
© 2024. All rights reserved.